Slab reinforcement
For selected slabs, adds background and openings reinforcement.
- Select one or more slabs;
- Click on the icon of the "Slab reinforcement" function;
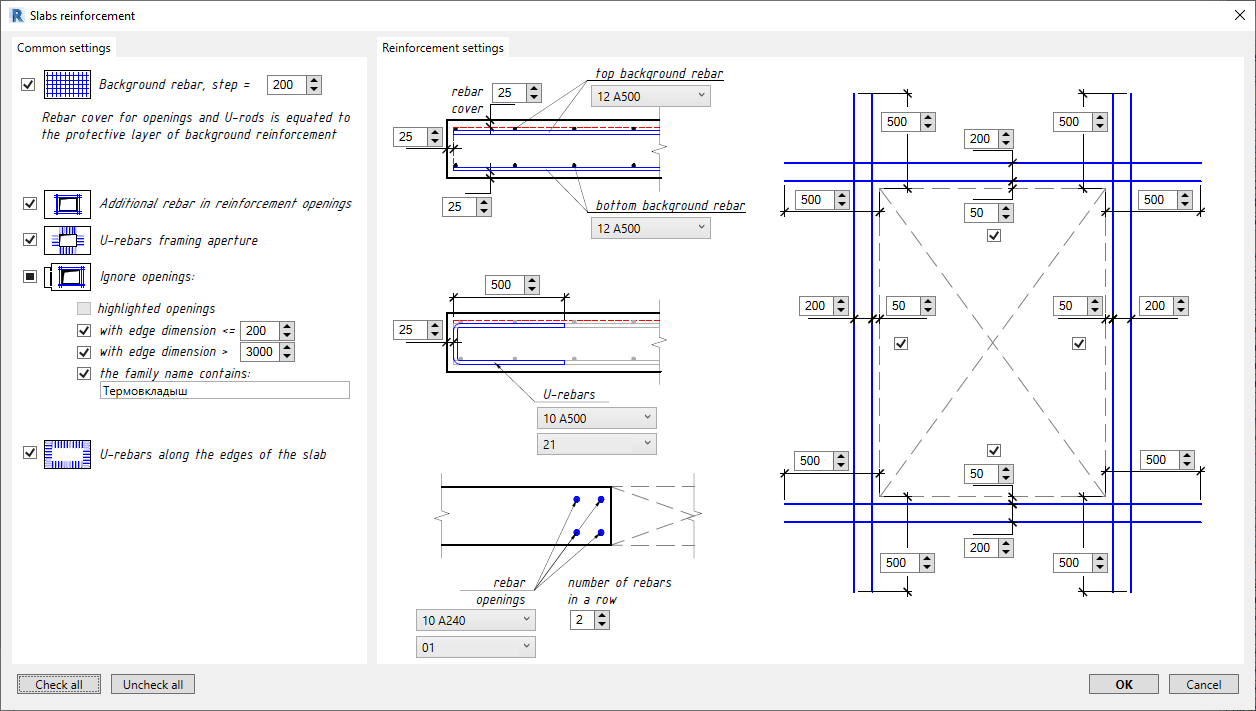
- In the "General settings" tab, select the necessary options;
- In the "Reinforcement settings" tab, set the diameter, shape, cover, number and length of reinforcing bars;
- Click «Ok» to create the slab reinforcement.
Background rebar
To create background reinforcement, the standard «Reinforcement by area» tool is used. Four (4) grid elements are created in the slab.
By default, Revit creates reinforcement meshes oriented towards each other. In the practice of building design, this is not accepted. The function automatically mirrors the lower grid. Thus, the reinforcing meshes are rotated so that the U-bars have the same height.
The protective layer of reinforcement bars for openings and U-rods is equal to the protective layer of background reinforcement.
Additional rebar in reinforcement openings
Creates straight reinforcing bars along each side of the opening.
U-rebars framing aperture
Creates U-bars along each side of the opening. The pitch of P-bars is equal to the pitch of the background reinforcement and is set in the item "Background reinforcement, pitch ="
Ignore openings
Does not add reinforcing bars and U-bars located along the edges of openings if one of the selected criteria is met.
Criterias of choice:
- Selected holes (you need to select holes in the model)
- with edge dimension <= (you must specify a number)
- the family name contains: (you must specify the text characters contained in the family name)
U-rebars along the edges of the slab
Creates U-bars along each side of the slab.
The pitch of U-bars is equal to the pitch of the background reinforcement and is set in the item "Background reinforcement, pitch ="